I love Easter. Its my favorite holiday and I always start planning for it early. I have so many cherished Easter memories with my hubby and kids. Hard to believe how time flies. This year I wanted to create something fun and special to celebrate Easter and I am thrilled to be able to share it with you. Yes, I know it isnt even Valentines Day yet but Easter is in March this year, so it will be here before you know it. :)
I created these egg shaped mini bread board sets just for Easter and I am so proud of them. They are made from a special type of walnut that my hubby gets that I just love because of the beautiful shade of color through it......kinda like Easter eggs. :)
For our table, I always like to use white dishes because thats my favorite but I also wanted to add a splash of Easter color so I picked up these lovely blue pasta bowls at Crate and Barrel. They were a splurge for me but I couldnt resist and we eat a lot of pasta so hey, why not, right?
I also wanted something to put Easter treats in for my kids and thought that these burlap sacks were just the cutest thing ever. I picked them up on Etsy here.
For some reason, Im drawn to anything egg shaped, especially involving the kitchen, so making these boards was seriously so much fun. They will be available in my Etsy shop for just the Easter holiday. And they will only be available in this walnut.
My hubby found this old table/desk and I absolutely love it. When he found it, the drawer was full of all kinds of vintage brochures and letters, which were lots of fun to look at. I had so much fun using it for this photo shoot. If it was bigger and had enough space for 6 people, I would totally use it for our dining table.
So if youd like to purchase a set of these cute little boards for Easter, click here. Since this is a special seasonal item, quantities are limited.
And thank you so much to everyone who takes the time to visit and leave a sweet comment here on the blog. I may not be able to respond to each of you, but know that I read every single comment and appreciate each one so much. And a huge thank you to all my shop customers. YOU make it possible for me to do what I love.....create. :) Easter Blessings to each of you!! ~Diana
Last week I reviewed American Paint Company chalk paints. This week, I wanted to give my review on the Annie Sloan Chalk Paint (ASCP ) brand.
I know. Most of you have heard of this product and have also probably tried it, but since this is the paint I use most for my furniture up-styling and really the standard I compare others too, I really needed to give it a comprehensive review.
For over 10 years I have been painting furniture and always with a latex. In the last year I have discovered, along with so many others, chalk paints and in particular ASCP. It completely changed painting furniture for me.
With ASCP painting became easier, quicker, and ...fun. I have, for the most part, completely stopped using latex. While some people may still like it, I think latex takes too long to dry, often leaves drips, can sometimes peel up when sanded and is basically...not fun.
When I first started using ASCP, I spent some time on the website learning about the product and from there I followed the links to a local retailer. I found there was one nearby and the next day I made my first purchase. This product was a dream to use. And other than getting some basic pointers, I found it virtually fool proof.
While I found the website a little tedious to navigate, there is a lot of good information and good links to tutorials. I especially liked the Annie Sloan Youtube channel here.
Annie Sloan French Linen
Working With the Product
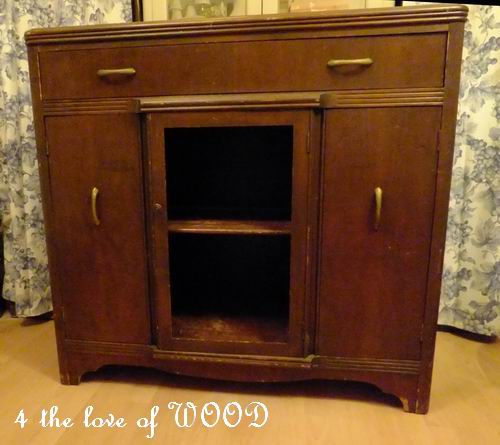
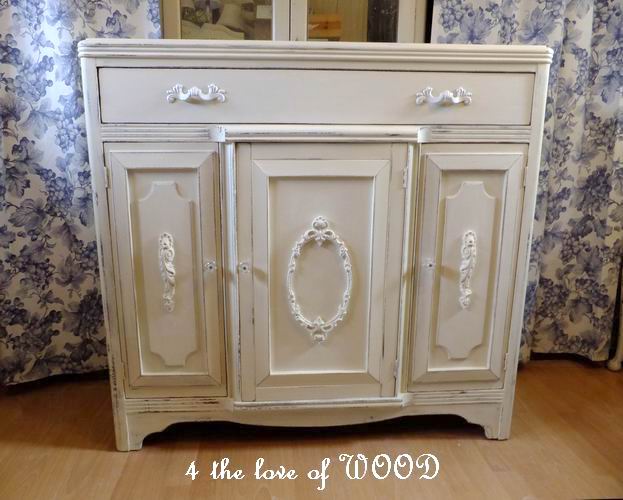
Working with the ASCP is a joy. I painted one of my first pieces in French Linen, a darker neutral gray. I opened the can and with no priming, began to paint. The product was thick, yet still,creamy and easy to apply. And even over a dark stained wood piece, only 2 coats were really needed. It also dried quickly, within half an hour. So, in less than a day, I was able to apply two coats and sand to distress!
Great coverage even after just one coat.
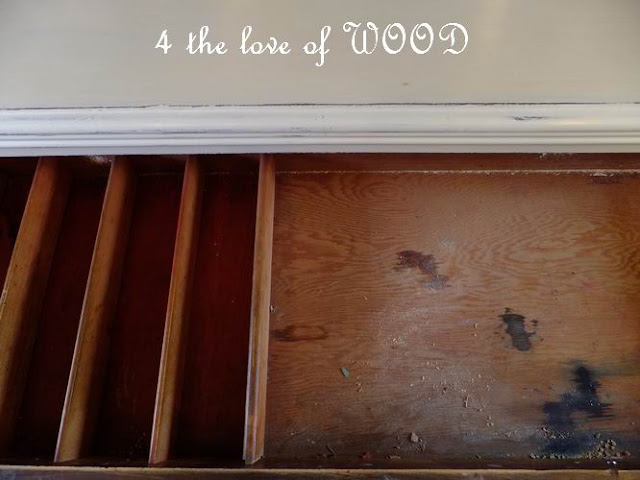
And talking about sanding, Annie Sloan recommends waxing and then sanding, to help with the dust. I prefer to sand first and wax only after I am sure I like my distressing. It does create some dust so you may want to do this outside.
Easy to sand and smooth….but lots of dust!
While it sands easily to distress, sanding does seem to leave some sheen differences. With the Fench linen, it seemed that where I sanded, the color became lighter and I spent some time trying to lightly sand everything to get a smooth and consistent color. However, I may have obsessed over this more than I needed.
Waxing
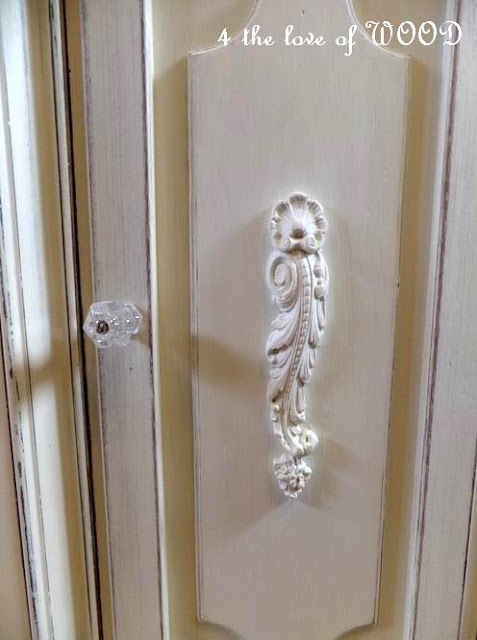
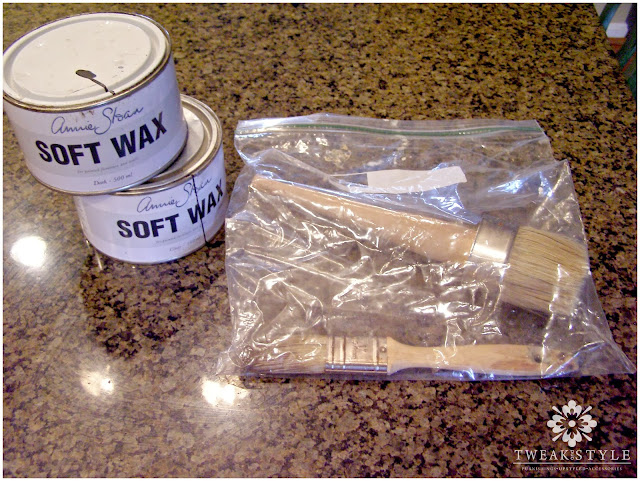
Annie Sloan wax comes in two colors, clear and dark. These were the first furniture waxes I ever used. Now, let me start by saying I love waxing way more than applying polyurethanes. It gives a natural look while most polys I find to look like plastic. It is also forgiving. You can remove it with mineral spirits if you need to and if a stray pet hair would land in the finish (and when hasnt that happened!), there is plenty of time to pick it out. In poly, that sucker will dry in there for good.
Overall, Annie Sloans waxes are good, but they are not my favorite.
As I have experimented with more waxes, I found Annies to have strong fumes, remain tacky longer, and take some time to get a finish that looks "even." It is really important to apply evenly, with long strokes and to remove excess. Again, maybe I obsess here. View The Purple Painted Ladys great tutorial here for tips, www.thepurplepaintedlady.com/2012/08/how-to-apply-clear-wax-video/
Heres a rundown of Annie Sloan products:
Annie Sloan Chalk Paint Point of Difference
From her website, "HOME of the BEST PAINT in the WORLD!". "Annie Sloan developed her signature range of decorative paint, Chalk Paint®, in 1990, she revolutionized the way we see decorative painting. She called her paint Chalk Paint® because of its velvety, matt finish. And if you add Annie Sloan Soft Wax, you can achieve subtle sheen as well as protection and durability
With a colour palette inspired by 18th and 20th Century decor and design, you can easily mix the colours together to extend the range. Chalk Paint® is eco-friendly too. It contains extremely low volatile organic compounds (VOCs) and has no odor.
Price Point (varies)
Paint $36.95 per quart and $11.95 for 4oz samples
Wax $24.95
Where to Order
Website www.anniesloan.com and click on American Shops for local retailers in the U.S. My favorite online www.thepurplepaintedlady.com Near me in Maryland/Virgina try www.shop.catfishcreativefurnishings.com. This shop is run by Celeste, one of the nicest and most talented stockiest I have had the pleasure to meet.
Best Annie Sloan Advice and Instruction
Check out Annies own youtube channel atwww.youtube.com/user/AnnieSloanOfficial
Also check out www.thepurplepaintedlady.com Her tutorials and posts are really thorough!
Color Palette Review
Annie sloan has a pallette of thirty shades and honestly, every color is drop dead beautiful. They give furniture the quintessential French chick look and her shades are the most requested by my clients.
My favorites so far…this is a tough one because they all are amazing…
French Linen
Paris Grey
Old Ochre
Aubusson Blue
Duck Egg Blue
Chalk Paint Application Review
It has a nice smooth consistency and I love that it gives such great coverage making it last long. So far it is creamier and requires less coats than my last review for American Paint Products. As with other Chalk Paints, for the smoothest application, I recommend doing your second or a light third coat with ASCP thinned with water.
Wax Review
While I still use Annie Sloans waxes, they are not my wax "go to" wax (see my review on American Paint Products here to read what wax I am using now). Overall, there are other waxes that have no fumes and are easier to apply.
Also, the dark wax must be applied over clear wax or you will stain the paint and not be able to remove "it." Some dark waxes can be applied without clear wax, which saves time and money. Annie also offers great brushes for waxing. While they are a little pricey, I recommend buying at least the large one. It will last you forever. I usually dont use much dark wax so I apply dark wax with an inexpensive chip brush.
What I loved Best
Smooth and easy application
Great coverage
The best colors
Favorite TipsHow to get a smooth chalk paint finish by The Purple Painted Lady, www.thepurplepaintedlady.com/2013/04/basic-tips-on-painting-laying-the-paint-video/ How to clean your wax brush by The Purple Painted Lady, www.thepurplepaintedlady.com/2012/08/how-to-clean-your-ultimate-wax-brush-and-wax-information/ How to keep your chalk paint from drying out, 2013/09/three-ways-to-protect-preserve-and.html Also check out here….great answers to so many questions.. on Annie Sloan Unfolded www.anniesloanunfolded.com/faqs
Behold the throw-away table my sister picked up off the street! At first I said, "nah, what the heck am I going to make with this clunky thing??" But she brought it over anyway.
I'm really into the beachy subway art theme so I thought why not try it on this table?
I finally figured out what I wanted to do with one of the big window frames we came across and finished it up yesterday. Let me tell ya, this sucker is heavy. Because of that, the only way we could figure out to hang it was from the ceiling joists. So, thats what we did. And it was quite a job getting those screwed in and getting that window up there. We used 2 large screw hooks for the joists, 2 large screw eyes for the window,
and connected the two with galvanized chain.
We couldnt be happier with the results.
I decided to take down the ledge I built and use it in another room. It had been there almost since we moved in and I was ready for a change in this little entry area. This was really the most logical place for the window. A lot of you suggested using it for a room divider, which I would have loved to do, however, our home is made up of lots of smallish rooms (except the dining room), not an open floor plan, so, there wasnt a room that needed to be divided.
I put together the little shelf in the corner for about 8 bucks using a piece of barn wood and "L" brackets from Lowes. I like using "L" brackets for shelves much better than using the brackets that are actually made for shelving. I like the industrial look of these and they are less expensive. These are 5 1/2 inches and cost 4 bucks each. You can find these, as well as other sizes, in the hardware section of Lowes or any home improvement store.
I found the pillow fabric here.
I really like the combination of the modern fabric pillows with the rustic bench.
Looking at this window makes me happy because it reminds me
of the fun bike rides we take every evening.
Now I have to figure out what to do with the others window frames or just
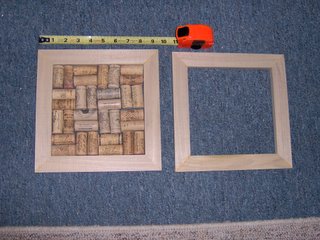
I got the idea for making wine cork trivets from seeing some made by my uncle Bernie. Mine have mitered and glued corners and a recessed bottom for a piece of 1/4 inch plywood. Mitered corners are weak because it is glued end grain to end grain. So I soup it up a bit by adding a triangular spline to each corner. To do the splines I first built a jig. This device runs down the fence of the tablesaw and holds a frame corner point down. I set the height of the blade so it doesnt cut all the way through (less to fuss over later) and then the fence so the slot is cut near the center of the frame corner. Then, 4 quick passes, turning each corner down and clamping to the jig for each pass. Next I take a contrasting type of wood and plane it until it can slide in the spline slots, but snugly. I cut this into triangles using the bandsaw. Each triangle gets glue on both faces and the long edge. The triangle is pressed into the slot and then clamped into place. Pieces of scrap wood protect the face of the frame from the metal of the C clamps. Splining like this glues face grain of the triangle to the face grain (inside of the slot) of the corner. It is incredibly strong and will probably never come apart. Looks good too. These wine cork trivets are made of poplar with cherry splines. Two of the five. They measure about 9 inches on each side. All 5 after glue up. Corks are mocked up, but not ready to install yet. Spline slots and cherry splines have been cut. One is glued up and the others are waiting.
Yesterday, I decided I COULD NOT TAKE IT any longer. That is, I could no longer take drying off from a shower using my grey (they were once white), crunchy (as my son calls them) towels.
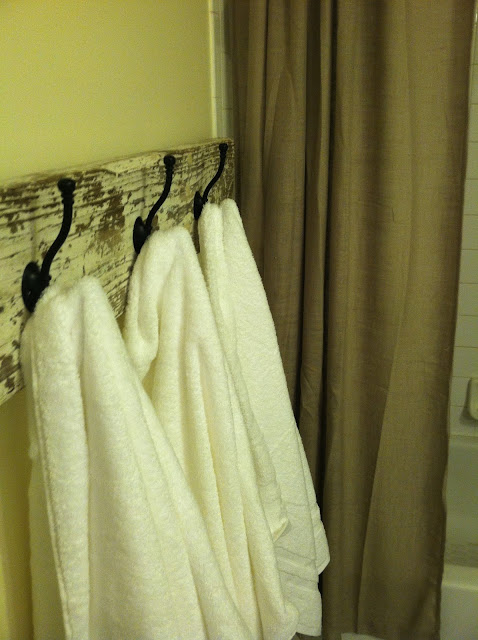
A sale was on at Kohls. This was my opportunity. So, with my coupon and Kohls cash in hand, I headed out to restock my towels. I checked Kohls towel ratings online, and then spent a good 15 minutes feeling all the towels for optimum softness. I ranked Jennifer Lopez towels as the softest, which makes complete sense as they are designed by a Diva. However, I went with the Sonoma, which were still soft and were a good $10 cheaper a towel, which also makes complete sense as these were not designed by a Diva. When I got home, I immediately yanked out all my old towels and then....filled my linen closet with the new fluffy white ones. Pure domestic joy!!
But this time around, I wanted to be sure my towels stayed white and soft for as long as possible. What could I do to prevent these towels from the same dingy fate of my old towels? After some research, I discovered that with any towel, softness can disappear after only a few washes due to hard water, excessive detergent and the use of fabric softener. Who knew??
So here is the best advice I found for keeping new towels white and fluffy....
6 Steps to Keep Towels Soft
Use less Detergent. Too much detergent eventually coats the towels fibers and leads to the dreaded crunchy towel. Use about half as much detergent as normal, so the rinse cycle can fully rinse out the detergent and wash in hot water to let the heat sanitize the towels
Do not use fabric softeners or dryer sheets. Who new??? Fabric softener actually damages your towels by building up on the fibers and pushing the fabric down. Fibers stiffen and become less absorbent.
Wash & dry fewer towels in each load. Smaller loads in the washer allow your machine to rinse out detergent better. Smaller loads in the dryer allow the air to fluff up the fabric.
Use vinegar. Vinegar is great for removing almost any buildup. Use about 1 cup of vinegar with only a little detergent and it will help remove detergent buildup and hard water stuck in the fiber or your towels. Not only will this keep the fibers fluffy and soft, but it will keep your towels absorbent.
Use baking soda. Occasionally add half a cup of baking soda to your detergent. This will help to loosen up towel fibers and clean off any buildup. This also helps eliminate any odors.
Use a water softener. This was a great recipe for homemade water softener that I found at www.hotelathome.net. This is good to use occasionally instead of vinegar if your water is hard. (This recipe also works great at restoring softness to older towels that you arent ready to toss).
Using a 2liter bottel that you have labeled as water softener.... From www.hotelathome.net...
The recipe. In the jug, pour a ½ a cup of Borax (available in most grocery store laundry sections) and a one cup of washing soda (sodium carbonate, sometimes called "lectric soda", also available in the laundry section) and 1/2 fill the jug with very hot water.
Mix well. Mix the solution until the powder mixture has completely dissolved. Pour this mixture into your 2 litre bottle and then fill the rest of the bottle up with water.
Softening your water. To use your homemade water softener, add one cup to each load of laundry, for particularly crunchy towels, you may need to add two cups of the mixture.
Easy Kids Woodworking ProjectsWoodworking is probably the finest hobbies you may get your son or daughter enthusiastic about. If they are a girl or a boy, woodwork is actually enjoyable for anybody. Woodwork is great for instructing your kids numerous facets of math, enables them to to utilize their own creativity when creating plans and design characteristics for his or her projects, looked after helps them using their control as well as skill while they utilize each device properly.
Kids Woodworking Projects
If you think your youngster will be thinking about taking up this particular new hobby, you can find effortless kids woodworking jobs online or even your neighborhood bookstore as well as catalogue. You might also acquire blessed as well as grab one or perhaps 2 publications although out in a yard sale. Wood working can be a healthful method for your youngster to produce several expertise and stay out of problems simply by simply carrying out some thing constructive in reference to his period he could be pleased with woodworking lathe. There are some things you should look at with all your children before theyre able to undertake this brand-completely innovative journey. You need to get them a few equipment that are the right dimensions for the kids and will not end up being since dangerous since the adult size types. A few of these tools include: hammer noticed sq . screwdrivers measuring tape Following, if you are searching with regard to wood working ideas your kids will be able to figure out how to read and comprehend in addition to execute, you can purchase pre-packaged packages who have everything your youngster would require. All that is necessary with these kits is always to browse the directions, adhere to combined with illustrations provided and put the items together. 2 well-liked and affordable children woodwork jobs that you can grab are a tool kit and a work bench. These types of jobs get children utilizing resources securely and teach all of these for your proper way associated with thinking in regards to the best way things are created and the way programs were created. Soon are going to creating and also creating any tree house or perhaps a go-kart. If your kids are older, you can use them that will help you build more descriptive tasks. A chuckle options for youngsters woodwork projects are: The crib to get a brand fresh inclusion for your family or perhaps a comparable The hobbyhorse has lang syne already recently been recently a popular for most Youngsters play house The solution guide container Any toy residence. When they have got got the woodworking plans with each other to generate their particular project, they could begin the creating and also piece of art with the project. You ought to let your children to express on their own up to they could making use of their projects. This will help these phones construct healthful personal confidences and present these people extra self-self-assurance to take on one more woodworking project next time. Who knows, over time you could have a well-known contractor or perhaps furnishings custom inside your household! Lastly - You can Obtain A large number of Wood working Ideas And Very very quickly Grasp Over 20 years of Woodworking Experience... Ive been redesigning, decorating as well as marketing home for a lot of years.I take pleasure in performing my own perform and performing my very own woodworking tasks and learn at woodworking school.
 I created these egg shaped mini bread board sets just for Easter and I am so proud of them. They are made from a special type of walnut that my hubby gets that I just love because of the beautiful shade of color through it......kinda like Easter eggs. :)

 I also wanted something to put Easter treats in for my kids and thought that these burlap sacks were just the cutest thing ever. I picked them up on Etsy here.
 For some reason, Im drawn to anything egg shaped, especially involving the kitchen, so making these boards was seriously so much fun. They will be available in my Etsy shop for just the Easter holiday. And they will only be available in this walnut.
 My hubby found this old table/desk and I absolutely love it. When he found it, the drawer was full of all kinds of vintage brochures and letters, which were lots of fun to look at. I had so much fun using it for this photo shoot. If it was bigger and had enough space for 6 people, I would totally use it for our dining table.
 So if youd like to purchase a set of these cute little boards for Easter, click here. Since this is a special seasonal item, quantities are limited.


 All 5 after glue up. Corks are mocked up, but not ready to install yet.
 Spline slots and cherry splines have been cut. One is glued up and the others are waiting.
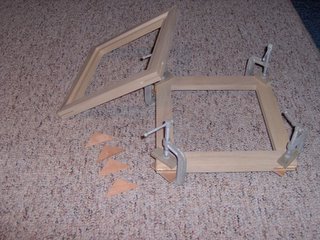


 Yesterday, I decided I COULD NOT TAKE IT any longer. That is, I could no longer take drying off from a shower using my grey (they were once white), crunchy (as my son calls them) towels.
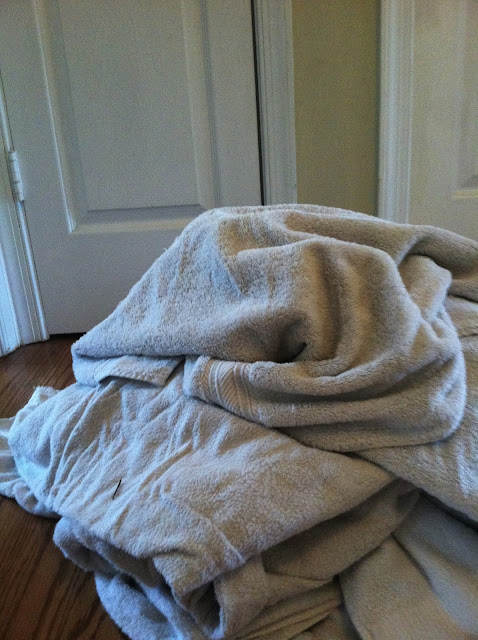 A sale was on at Kohls. This was my opportunity. So, with my coupon and Kohls cash in hand, I headed out to restock my towels. I checked Kohls towel ratings online, and then spent a good 15 minutes feeling all the towels for optimum softness. I ranked Jennifer Lopez towels as the softest, which makes complete sense as they are designed by a Diva. However, I went with the Sonoma, which were still soft and were a good $10 cheaper a towel, which also makes complete sense as these were not designed by a Diva.
 But this time around, I wanted to be sure my towels stayed white and soft for as long as possible. What could I do to prevent these towels from the same dingy fate of my old towels? After some research, I discovered that with any towel, softness can disappear after only a few washes due to hard water, excessive detergent and the use of fabric softener. Who knew??