I finally figured out what I wanted to do with one of the big window frames we came across and finished it up yesterday. Let me tell ya, this sucker is heavy. Because of that, the only way we could figure out to hang it was from the ceiling joists. So, thats what we did. And it was quite a job getting those screwed in and getting that window up there. We used 2 large screw hooks for the joists, 2 large screw eyes for the window,
and connected the two with galvanized chain.
We couldnt be happier with the results.
I decided to take down the ledge I built and use it in another room. It had been there almost since we moved in and I was ready for a change in this little entry area. This was really the most logical place for the window. A lot of you suggested using it for a room divider, which I would have loved to do, however, our home is made up of lots of smallish rooms (except the dining room), not an open floor plan, so, there wasnt a room that needed to be divided.
I put together the little shelf in the corner for about 8 bucks using a piece of barn wood and "L" brackets from Lowes. I like using "L" brackets for shelves much better than using the brackets that are actually made for shelving. I like the industrial look of these and they are less expensive. These are 5 1/2 inches and cost 4 bucks each. You can find these, as well as other sizes, in the hardware section of Lowes or any home improvement store.
I found the pillow fabric here.
I really like the combination of the modern fabric pillows with the rustic bench.
Looking at this window makes me happy because it reminds me
of the fun bike rides we take every evening.
Now I have to figure out what to do with the others window frames or just
Here are pictures of the special frames: Rough sycamore board on left. Planed and sized inner frame pieces on right. Sample with finished profile on top. Sycamore shavings from planing the parts for the inner frames. 
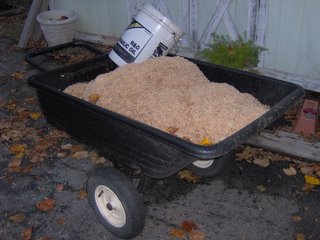
Cherry outer frame parts before planing. Needed 8 more. 
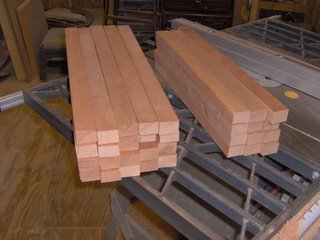
All the sycamore after shaping. 
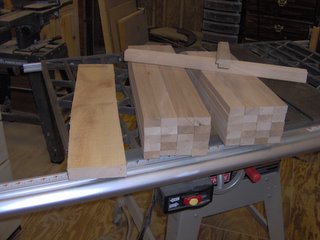
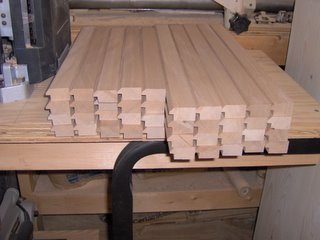
Some cherry outer frame pieces after planing and shaping. 
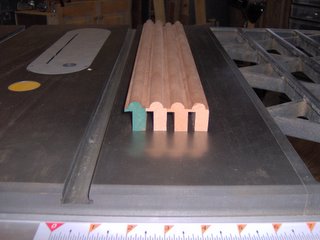
Mockup of outer and inner frame pieces, dry fitted at a mitered corner. 
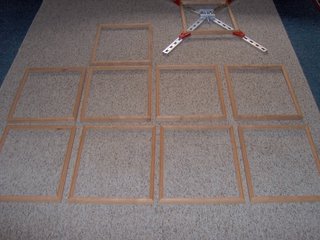
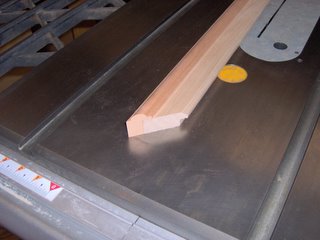
All the sycamore inner frames, sorted, dry fit, and one already glued and clamped. 
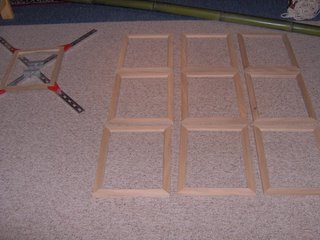
All the cherry outer frames, dry fit, and one glued and clamped.
Every evening my hubby, our youngest and I go for a bike ride. Its one of our favorite things to do just before sunset. On our ride we always pass a house that had these wonderful HUGE old wood windows leaned up against their back garage, not being used for years. To me, they were lovely and I couldnt believe they had been so easily discarded. I finally persuaded hubby to go ask the owners about them. Turns out, they didnt want them any longer so we happily took them off their hands. Just goes to show, it certainly pays to ask, right?
Heres one of them before I did anything to it.
There were 4 windows total, each of them 6 feet tall, two of them 4 feet wide and two of them 2 feet wide. Several of the panes were broken out of a couple of them, but after looking at the windows more closely, I figure they can be easily replaced. And hopefully, inexpensively.
Im hoping to do something unique with one of the larger windows and
so I spent the weekend prepping it.
I happen to be in love with black window frames. Im usually not one to incorporate lots of the color black into my decor but there is something about black window frames that I find stunning.
Here are a couple of inspiration pics I found while hunting for some inspiration.
via
I especially like them in mostly white rooms.
via
And I really love them with warm wood accents.
via
They really make quite an architectural statement.
via
via
via
Of course, our house looks nothing like any of these and we arent changing our windows if thats what youre thinking. I dont think were up for that kind of project. ;)
But I love looking for inspiration this way. Most of the ideas I came across for using window frames were a chalkboard, frame for photos, room dividers, mirrors, etc. Im still not 100% sure what Im doing with this big ol thing but I love it so much I just have to use it, right? And it is a "souvenir" of sorts to remind me of the relaxing bike rides we take each evening after dinner that have become so special to me.
I gave it a good cleaning and then scraped all the old paint off and painted it a color called Charcoal Sketch from Better Homes and Gardens. Heres how it looks now.
As you can see, it is huge. But thats what I love about it. Ive never been all that into old window frames but this one is a treasure because of the size. And thats why I really want to do something special with it. I just have to figure out what that is! :)
The inner frames have all been fitted into the outer. The outer frames have been splined. I am currently drilling shallow holes (using a Forstner bit) into the backs of the frames. These holes will allow me to recess pennies into them (I am also drilling holes in 100 pennies...10 pennies per frame). The pennies will be screwed to the cherry outer frame and pressure will hold the sycamore inner frame in place. I have mocked up one frame and this method works great. It will allow the frames to expand and contract without breaking apart. So, now I need to drill 9 more frames and 90 more pennies. Then do the sanding, staining and finishing. All in just a couple of days. Boy, I HAVE to start in the summer next year. This will come down to the wire, which I didnt want to happen.