I finally figured out what I wanted to do with one of the big window frames we came across and finished it up yesterday. Let me tell ya, this sucker is heavy. Because of that, the only way we could figure out to hang it was from the ceiling joists. So, thats what we did. And it was quite a job getting those screwed in and getting that window up there. We used 2 large screw hooks for the joists, 2 large screw eyes for the window,
and connected the two with galvanized chain.
We couldnt be happier with the results.
I decided to take down the ledge I built and use it in another room. It had been there almost since we moved in and I was ready for a change in this little entry area. This was really the most logical place for the window. A lot of you suggested using it for a room divider, which I would have loved to do, however, our home is made up of lots of smallish rooms (except the dining room), not an open floor plan, so, there wasnt a room that needed to be divided.
I put together the little shelf in the corner for about 8 bucks using a piece of barn wood and "L" brackets from Lowes. I like using "L" brackets for shelves much better than using the brackets that are actually made for shelving. I like the industrial look of these and they are less expensive. These are 5 1/2 inches and cost 4 bucks each. You can find these, as well as other sizes, in the hardware section of Lowes or any home improvement store.
I found the pillow fabric here.
I really like the combination of the modern fabric pillows with the rustic bench.
Looking at this window makes me happy because it reminds me
of the fun bike rides we take every evening.
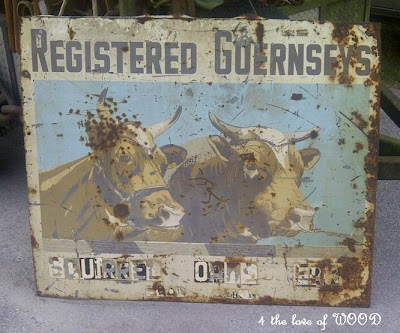
Now I have to figure out what to do with the others window frames or just
I was surprised at the interest in the crack-house dresser that I had painted. I had listed on CL and got quite a few calls. I even had multiple buyers for it on the same day. The person asked me if I was going to be doing any more like it. So, when I came across these two siblings, I thought I could paint one in the same fashion. So I did!
Like my garage??? 3 dressers (four if you count the one you cant see) a hutch and a buffet....all awaiting my time. Yeah, ok, sure...Ill get right on that. The two siblings are on the left with the oh-so fetching coat of arms brand-thing is what Im working on. The one below is the smaller of the two. I dont even know what that green/yellow monstrosity is, even the owner didnt know what it was.
All I know was that it had to go bye-bye. Some wood filler and a good sanding, and away it went.
So...here it is,,,,crack-house dresser paint #2!
This one was in far better shape. I refinished the top and shined up all the brass hardware.
The top was refinished with Varthane gel walnut, wood sealer, and dark paste wax. I used the same turquoise and orange paint. The yellow was just something I had laying (lying?? I always get those mixed up...dogs lay, people lie..What about paint?? Hah!) around.
The Hub polished up all the hardware on his polisher. Almost looks as though they brass plated copper!
The little brass studs were solid black. They shined up pretty durn good!!
I thought this fabric went perfectly with the colors.
This is a really nice shot of my cats butt.
Linking up to all my faves, see below......plus http://www.myrepurposedlife.net/</a>
This past Sunday I spent like most Sundays. Doing laundry. Then, doing more laundry. Oh, and also ironing. Lets not forget that. However, in between all my domestic responsibities, I was also able to fit in one of the many tasks on my never ending to do list. I was able to finish lining the drawers of a furntiture piece I recently completed. Yay! Ok, this was not really an exciting task, but I got it done. A couple of weeks ago, I finished a dresser/buffet in a finish I call Two-Toned Glam. The piece came out beautifully in the end, but it had given me little fits here and there. Just little things. For intstance, I talked in an earlier post about having to deal with water marks that had popped up. Another minor, but nevertheless so very annoying, problem with this piece was a drawer which had a stain. From time to time, I will have a great piece to refinish that may have stains or marks inside the drawers. And, because most of my pieces I sell at my Etsy shop, I want to be sure they go to my customers in good shape. Sometimes, I can clean away marks. Other times, I may need to sand them away. On this piece, however, the stain was too deep and superficial sanding would not work.
So, my favorite, and by far the easiest, fix for imperfect drawers is lining them with adhesive cork.
This brand I purchase right at Home Depot. It gives a clean and natural look and for drawers that could see a lot of wear, it is very durable. It also "naturally resists mold and mildew, as well as, cushions and protects"...that there is right off the label! First, I measure the length and width of the drawer. Oh, and take out the drawer to make it easier...which I, of course, did not yet do in this picture.
Then, unroll your cork adhesive onto a flat surface and mark off the drawer measurements on the back grid and cut along the lines.
Next, peel back one corner of the cut liner and lay the adhesive side down in your selected drawer corner.
Once your corner is down, slowly pull the white paper off the adhesive back, working from the first corner. At the same time you are pulling the white paper off, begin pressing down the adhesive side, smoothing as you go.
Here is my drawer "after" with the cork liner. It is a downright pretty inside of a drawer...dont you think?


 Linking up to all my faves, see below......plus http://www.myrepurposedlife.net/</a>
 So, my favorite, and by far the easiest, fix for imperfect drawers is lining them with adhesive cork.
 This brand I purchase right at Home Depot.