Hey there! We are in the process of redoing our boys rooms upstairs and this past week, I worked on several projects for little guys room. I was so happy with how they turned out, but it sure didnt start out that way. I have a tendency to get in a hurry when working on projects, because usually I have other things to do like laundry, dinner, and being a mom and wife, so I get in a hurry and do things wrong only to have to go back and redo. Not fun. First up was this headboard I made for his room using our collection of vintage yardsticks.
I started out by building a simple frame using 1 x 2s and attaching the yardsticks to the front of the frame. Because I didnt want to use all yardsticks, I also used groups of lattice strips that I already had from a previous project.
Originally, I stained those strips of lattice with Minwax special walnut stain. But I didnt love it and it didnt look right. So, after staring at it for a couple of days, I pried off the lattice strips and started over. Luckily, I had plenty of those strips laying around. Does anyone else ever do that? Redo a project if it isnt just right? Or do you just live with it?
Redoing this project wasnt that much of a hassle, and I really did want it to look perfect for his room. After they were all attached, I simply coated them with a clear water based polyurethane. Then for the top, attached a 1 x 3 and thats it. Heres a peek at it before I show you the rest of the room. Total cost for this headboard? Nothing! We already had everything needed. :)
The next project I worked on was a vintage map. I am crazy for those old vintage pull down classroom maps. But we dont happen to have $600 laying around to buy one. Maybe Im exaggerating a little but not much. Ive never been lucky enough to find one for below $300 so I did the next best thing. Made one myself. I had already purchased a fun vintage classroom map from Etsy for less than 20 bucks but it was just a regular ol map. Not the pull down variety so, I turned it into the pull down variety. :)
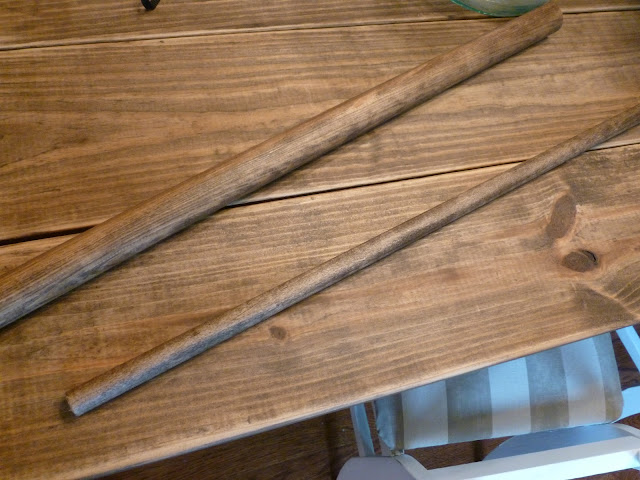
I started by completely coating the map with Mod Podge glue in glossy finish. It gives the map a shiny, thick surface similar to the pull down kind. Then I headed to Lowes to pick up the supplies I needed. Total cost for this project, not including the map, was less than 15 bucks. I picked up a large round wood dowel rod that is used for hanging in closets. Some vintage copper spray paint, a 3/4 inch wood dowel rod and two packages of white plastic closet rod sockets. I cut the dowels to be about half an inch longer than the map on both sides and then stained them with Minwax special walnut stain.
Then I lined up the map with the dowels and attached industrial velcro strips to the dowel and the map.
I also used little dabs of hot glue. I wanted to make sure it stuck to the dowel but also didnt tear the map. Then I repeated that process with the smaller dowel for the bottom. After that I took the plastic rod sockets and spray painted them with the vintage copper spray paint.
I attached those to the end of the top, larger dowel with hot glue and the screw included in the packet with the socket, leaving about 1/4 inch of it sticking out of the dowel.
Repeat with the other end. Next I took hemp twine and tied it around the screw head also attaching to the other side. This will be what you hang the map from on the wall.
I hadnt planned on putting anything on the bottom dowel but it didnt look right. So, I cut two 1/4 inch pieces off the scrap of larger dowel I had from the previous step and spray painted both of them with vintage copper spray paint.
I hot glued those to the ends of the smaller dowel on the bottom of the map.
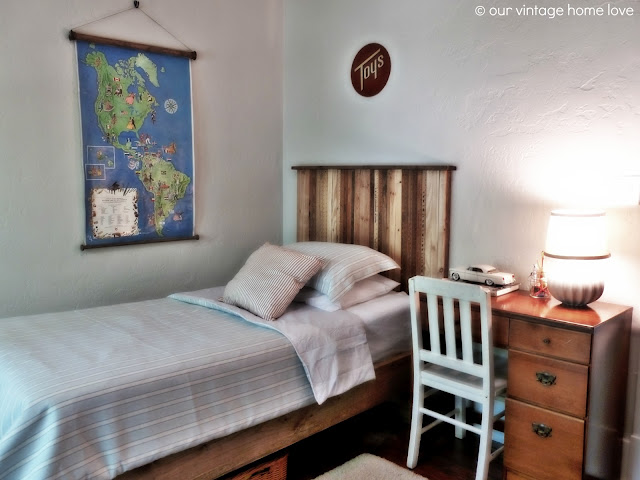
I absolutely love it! Who needs a $300 pull down when you can make a faux one for 15 bucks? And whenever we decide to store it, all we have to do is roll it up on the dowel rods instead of folding. Here it is in the room.
The other major project I did in this room was make him a new bed out of those awesome 2 x 8s and a couple of reclaimed beams my hubby found. Total cost for the bed? 15 bucks!! Who knew you could make a bed for so cheap?!
I started by cleaning those beams hubby brought home. Heres a pic of one of them before I sanded them down.
And after sanding.
Beautiful. I cut them into four 12 inch pieces and coated them with Minwax Finishing Paste Wax in natural. I love this stuff.
This next part was hard and I endured all kinds of injuries while doing it. I measured the old bed frame, which was just one of those metal ones with wheels and cut my 2 x 8s to the appropriate length. Then I attached them to each other to make a box, then attached the reclaimed 4 x 4 legs to the inside of the "box". I also attached a couple of scrap 2 x 4s to the inside to also act as a brace for the box frame to sit on. It would also be sitting on top of the 4 x 4s. I kind of followed this tutorial.
This is definitely a project needing two people. My hubby was at work so I tried doing it myself and had the thing fall on me a couple of times leaving me bruised and bloody, before enlisting the help of my older boys. You definitely need heavy duty long screws to make sure its secure and that takes two people to get them into the wood. I figured this out after trying to hold the 40 pound boards myself while also trying to screw them together, missing and stabbing myself in the palm with the power screwdriver. Good times. And then after my two older guys carried it upstairs to little guys room......guess what, it was too big. So, after I cried a little, or maybe a lot, I took the darn thing apart in the bedroom cause there was no way we were carrying it back downstairs and outside. I took the two end boards and cut 3 inches off them, brought them back upstairs and reattached everything. Then it was a perfect fit. Finally. It. Was. Hard. And a project I dont want to do again. But oh how happy I was with the end result.

I used the same process for aging my dining room tabletop to age these boards to match the reclaimed wood of the legs.
Little guy was so excited and happy about his new bed so all this was totally worth it just seeing his happy face. This new bed frame made his bed a little higher than the other one did, which he just loved. I picked up this blue striped fabric at, of all places, Walmart, for $6 a yard and made a duvet cover for his previous bedspread. I only had to purchase 3 yards for the front and I used a $5 flat sheet for the back, sewed them together, slipped the old bedspread inside and voila. A new bedspread.
I repainted his walls, which were previously light blue, a color called Classic Gray by Benjamin Moore. I liked it so much that Im now painting our dining room the same color.
Im actually not finished with the other side of the room yet, so that will come in another post.
I attached the headboard to the wall, not the bed. I am so crazy about his sweet little room. And more importantly, he is crazy about it, too!






 Have a great day!
 Pretty cute little table, huh? But then she noticed one of the back legs was a little crooked....
 So, she decided to turn it into something more functional for her family, which is awesome.
 Some foam, batting, pretty fabric and a LOT of work later, she transformed it into this....
 Amazing! I absolutely love it, dont you?! And Im loving that fabric. You can find out her exact step by step process and see more photos over on her blog Maple Leaves and Sycamore Trees in case youd like to try a redo like this.
 It was a solid wood piece and in great condition, just needed a paint job and new hardware. What I had in mind for the dresser was a very distressed, green, hand rubbed aged look. So the first thing I did was paint it the same color that I painted our french door in the kitchen, which is called Spanish Green by Valspar.
 I am crazy about it! I dont think it could have turned out better than what I envisioned.
  And Im loving the three different sets of drawer pulls.
 Heres a closeup of the different colors and stains I used to distress the dresser.
 Ive got a couple more pieces to share with you before I blog about the entire room so stay tuned!